Google launches the “Store widget” — WordPress Setup & Guide for eCommerce Retailers
On September 18, 2025, Google officially announced the launch of a new feature called the Store widget, designed to help online retailers increase shopper confidence and improve sales. The update was published on the Google Search Central Blog, where the company explained that the widget provides real-time store quality signals—such as ratings, shipping and return policies, and customer reviews—directly on a merchant’s website.
The goal behind this release is simple yet powerful: reduce hesitation in the buying journey by showcasing trust signals verified by Google itself. According to Google’s announcement, businesses that implemented the Store widget on their websites experienced up to 8% higher sales within 90 days compared to similar businesses that did not use the widget. This positions the Store widget as a significant opportunity for eCommerce retailers looking to boost both visibility and legitimacy in an increasingly competitive online marketplace (Source: Google Developers).
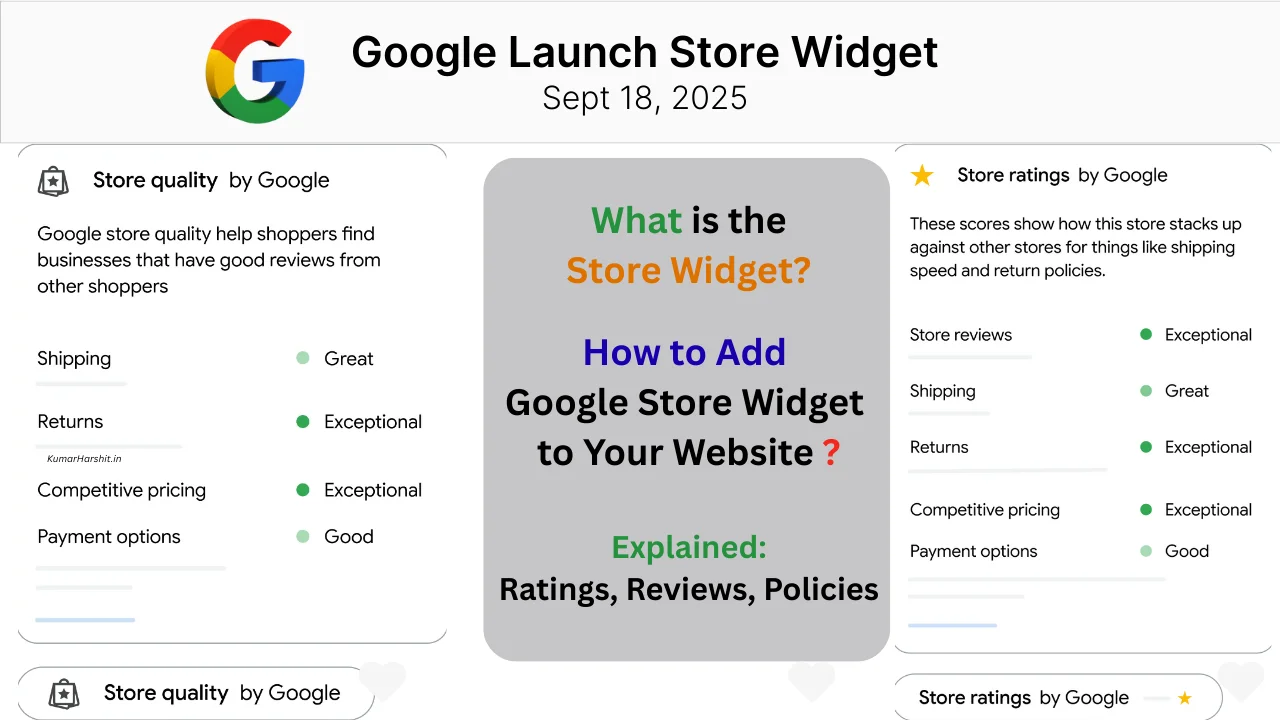
What is the Store Widget?
The Store widget is a dynamic, interactive element developed by Google that merchants can embed directly onto their websites. Once installed, it automatically displays verified details about the store, such as the Google store rating, shipping and return policies, and customer reviews. These signals update in real time, ensuring that shoppers always see the latest information about the business.
Unlike traditional trust badges that often rely on third-party review platforms, the Store widget is powered by Google’s own Merchant Center ecosystem. This means the information presented to shoppers comes directly from Google’s verified systems, which enhances credibility and reduces uncertainty during the buying process.
Google emphasizes that the widget is not static—it is continuously refreshed with the latest store quality ratings. Retailers are encouraged to place it on high-visibility areas of their websites, such as the homepage or product pages, to maximize its impact on customer trust and conversions (Source: Google Developers).
Why the Store Widget Matters to eCommerce Businesses
For online retailers, one of the biggest challenges isn’t just attracting visitors—it’s convincing them to complete a purchase. Shoppers often hesitate because they are unsure about a store’s credibility, delivery reliability, or customer service standards. Google created the Store widget to directly address these concerns by surfacing trust indicators at the point of decision-making.
According to Google, the widget solves two fundamental problems that eCommerce businesses face today:
- Boosting visibility — By placing official store quality signals directly on the site, merchants can stand out from competitors who lack these credibility markers.
- Establishing legitimacy — Verified ratings, reviews, and policy details displayed through the widget reassure shoppers that they’re buying from a trustworthy source.
Google’s own data shows that the impact of trust signals can be measurable: retailers using the Store widget reported up to 8% higher sales within 90 days compared to similar merchants that did not display it. In a marketplace where even small percentage gains can translate into significant revenue, the Store widget offers a practical, low-effort method to enhance conversion rates and overall brand perception (Source: Google Developers).
The Three Widget Types Explained
Not every store will display the same version of Google’s Store widget. Instead, the widget comes in three different tiers, and the version shown on a merchant’s website depends on its current standing within Google’s quality ecosystem.
1. Top Quality Store Widget
This is the highest-level badge available. It appears when a business has earned the Top Quality store status from Google. This tier highlights a store’s consistent track record of delivering a high-quality shopping experience, backed by strong ratings and reliable policies. Merchants who reach this level benefit from maximum trust signals, since the “Top Quality” label communicates excellence directly to potential customers.
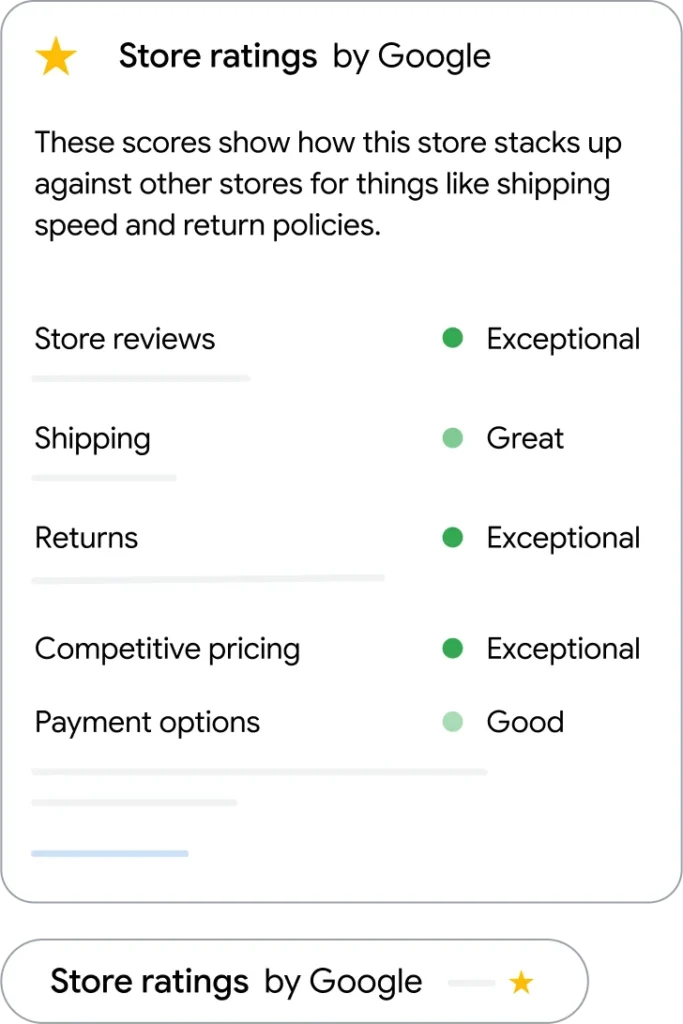
2. Store Rating Widget
If a retailer has a high Google store rating but hasn’t yet reached Top Quality status, the Store Rating widget will be displayed. This version still provides strong reassurance to shoppers by showcasing ratings and reviews but does not carry the additional Top Quality badge. It serves as recognition that the store performs above average while encouraging merchants to continue improving toward the top tier.
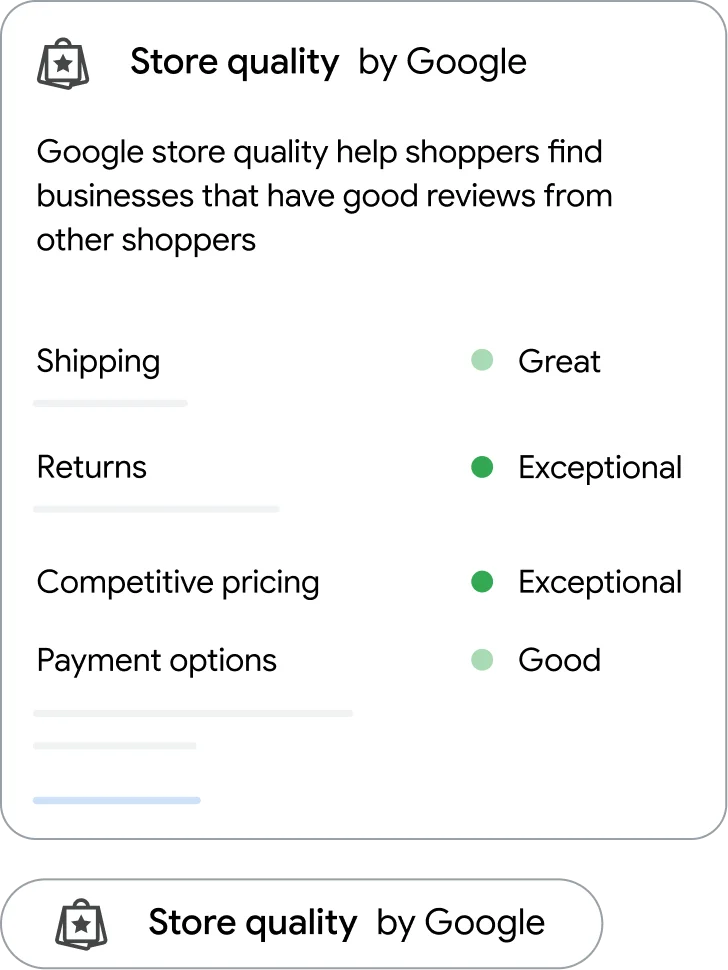
3. Generic Store Widget
For stores that are still on the path to earning higher trust badges, Google provides a generic version of the widget. This acts as an entry point, allowing merchants to begin building credibility with visible quality indicators, even if they haven’t yet achieved top ratings. Over time, as store performance improves, eligibility can advance to the higher widget tiers.
These three tiers ensure that shoppers always see an accurate reflection of a store’s standing, while also motivating merchants to continuously improve their service quality. The version displayed is automatically determined by Google, based on eligibility criteria set out in Merchant Center (Source: Google Developers).
Features and Elements Inside the Widget
The Store widget isn’t just a simple badge — it’s a dynamic display of trust signals that can significantly influence shopper behavior. According to Google, the widget highlights several key elements that communicate store quality and reliability:
- Google Store Rating – A visual rating based on customer feedback and performance metrics, giving shoppers an instant sense of your business reputation.
- Shipping Policies – Clear details on delivery timelines, helping buyers know when they can expect their orders.
- Return Policies – Transparent information about how returns and refunds are handled, which is often a deciding factor for hesitant shoppers.
- Customer Reviews – Verified reviews sourced directly from Google’s ecosystem, providing authentic social proof to support purchase decisions.
One of the biggest advantages of the widget is that it stays up to date automatically. The information displayed—ratings, reviews, and policies—are refreshed in real time from Google’s Merchant Center systems. This ensures that merchants don’t have to manually update trust indicators across their website.
Google also recommends displaying the widget on high-traffic and high-impact pages, particularly the homepage and product detail pages, where trust signals can directly reduce abandonment and increase conversions (Source: Google Developers).
Where to Place the Widget on Your Site
Simply adding the Store widget to a website is not enough — placement matters. Google recommends positioning the widget in areas where shoppers are most likely to make purchase decisions or need reassurance about a store’s credibility.
The two most effective placements are:
- Homepage
- The homepage is often the first touchpoint for new visitors. By placing the widget here, merchants can immediately communicate trustworthiness and quality to potential buyers. This first impression can reduce bounce rates and set a positive tone for the entire shopping experience.
- Product Pages
- When customers are viewing individual products, they are closer to making a buying decision. Displaying the Store widget alongside product details provides additional reassurance that the seller is reliable, which can help overcome last-minute hesitation before checkout.
Because the widget automatically updates based on Google’s real-time store quality ratings, retailers don’t need to worry about ongoing maintenance. Once the snippet is embedded, it consistently displays the latest verified information about the business (Source: Google Developers).
How to Participate (Eligibility & Merchant Center Setup)
Not every retailer will see the Store widget appear automatically. To enable it, businesses must participate through Google Merchant Center, where eligibility is determined and the official installation snippet is provided.
Steps to Get Started
- Check Eligibility in Merchant Center
- Sign in to your Google Merchant Center account and review the “Store widget” participation details. Google provides clear criteria to determine which widget tier (Top Quality, Store Rating, or Generic) your store qualifies for.
- Follow the Official Participation Guide
- Google’s official documentation explains how merchants can activate the widget and access the snippet needed for embedding. This process ensures that the widget displays correctly and pulls verified, real-time data about your store.
- Obtain the Widget Snippet
- Merchant Center will generate the exact snippet you need to insert into your website. This snippet is unique to your account and should not be altered.
- Embed on Your Website
- Once you have the snippet, you can place it on your homepage, product pages, or other high-impact sections of your site. For WordPress users, the snippet can be inserted using a Custom HTML block, widget areas, or even via a safe header/footer injection plugin.
For full details, merchants should refer to Google’s official documentation:
These resources ensure that merchants follow the correct process and always use the latest snippet provided by Google (Source: Google Developers).
Step-by-Step WordPress Integration
For most eCommerce retailers, especially those using WordPress or WooCommerce, adding the Store widget to a website is straightforward. Google provides the official snippet inside Merchant Center, and merchants only need to embed it correctly without modification. Below is a safe step-by-step workflow for WordPress users.
Step 1: Get the Official Snippet
- Log in to Google Merchant Center.
- Navigate to the “Store widget” section and copy the snippet provided for your account.
- Remember: this snippet is unique to your store and should never be altered.
Step 2: Choose Placement Location
Google recommends placing the widget on:
- Homepage (to build trust at first entry).
- Product Pages (to reduce hesitation during checkout decisions).
Step 3: Insert the Snippet in WordPress
There are three recommended methods to add the widget:
- Gutenberg Custom HTML Block
- Open the page editor (Homepage or Product page).
- Add a “Custom HTML” block.
- Paste the snippet directly into the block and update the page.
- Widgets / Footer Placement
- Go to Appearance → Widgets in WordPress.
- Add a “Custom HTML” widget in the footer or sidebar.
- Paste the snippet and save.
- Header/Footer Injection Plugin
- Install a safe plugin like Insert Headers and Footers (by WPBeginner) or similar.
- Paste the snippet in the footer section so it appears across all pages.
Step 4: Test the Widget
- Visit your site in an incognito browser.
- Confirm the Store widget appears and loads correctly.
- Return to Merchant Center to verify that the widget is active and linked to your store profile.
Example Wrapper (Illustration Only)
Here’s an example wrapper showing where the official snippet would be placed. Replace the placeholder with the actual snippet from Merchant Center:
<!-- Wrapper for Google Store Widget --> <div class="google-store-widget"> <!-- Paste the official Merchant Center snippet here --> <!-- Example placeholder only: --> <!-- <script async src="https://example.google.widget/loader.js"></script> <div id="google-store-widget" data-merchant="YOUR_MERCHANT_ID"></div> --> </div> ⚠️ Important: Always use the snippet provided in your Merchant Center account. Do not copy examples from third-party sites or alter the script code.
(Source: Google Developers)
Example Implementation Code (WordPress Shortcode Wrapper)
For merchants who want more flexibility, the Store widget can be integrated into WordPress using a shortcode wrapper. This method allows you to place the widget anywhere within posts, pages, or templates simply by inserting a shortcode like [store_widget].
This is particularly useful for WooCommerce stores, where you may want the widget to appear automatically on product pages or in specific sections of your theme.
Step 1: Add the Shortcode to Your Theme
Open your child theme’s functions.php file (or use a custom functionality plugin) and insert the following code:
// Shortcode for Google Store Widget function kh_store_widget_shortcode() { ob_start(); ?> <div class="google-store-widget"> <!-- IMPORTANT: Replace the placeholder below with the official snippet from Google Merchant Center --> <!-- Example placeholder only --> <!-- <script async src="https://example.google.widget/loader.js"></script> <div id="google-store-widget" data-merchant="YOUR_MERCHANT_ID"></div> --> </div> <?php return ob_get_clean(); } add_shortcode('store_widget', 'kh_store_widget_shortcode'); Step 2: Use the Shortcode Anywhere
- Insert
[store_widget]into any page, post, or product description. - The widget will automatically render wherever the shortcode is used.
Step 3: Advanced Placement (Optional)
If you’d like the Store widget to appear across all WooCommerce product pages without manually editing each one, add this snippet into functions.php:
// Auto-insert Store Widget after WooCommerce product summary add_action('woocommerce_after_single_product_summary', function() { echo do_shortcode('[store_widget]'); }, 15); This will automatically display the widget below the product details section for every product page.
⚠️ Reminder: Always replace the placeholder script with the exact snippet provided by Google Merchant Center for your store. Do not modify the official script code.
(Source: Google Developers)
How to Implement the Store Widget with Positioning, Region Setup, and Testing
The official Store widget integration requires only small HTML updates but must follow Google’s exact pattern to work reliably. Confirm the first line of your page is <!DOCTYPE html>; then add the widget code inside the page <head> exactly as shown.
Basic embed (default: bottom-right):
<!-- BEGIN MerchantWidget Code --> <script id="merchantWidgetScript" src="https://www.gstatic.com/shopping/merchant/merchantwidget.js" defer> </script> <script type="text/javascript"> merchantWidgetScript.addEventListener('load', function () { merchantwidget.start({ position: 'RIGHT_BOTTOM' }); }); </script> <!-- END MerchantWidget Code --> If you want the widget on the bottom-left, replace RIGHT_BOTTOM with LEFT_BOTTOM.
Merchants can also customize spacing using four parameters. Defaults are:
sideMargin: 36bottomMargin: 36mobileSideMargin: 16mobileBottomMargin: 46
Example — left placement with custom margins:
<script id="merchantWidgetScript" src="https://www.gstatic.com/shopping/merchant/merchantwidget.js" defer></script> <script type="text/javascript"> merchantWidgetScript.addEventListener('load', function () { merchantwidget.start({ position: 'LEFT_BOTTOM', sideMargin: 21, bottomMargin: 33, mobileSideMargin: 11, mobileBottomMargin: 19 }); }); </script> After embedding, your page <head> should include the loader (single <script id="merchantWidgetScript" ...>) and one initialization block using merchantWidgetScript.addEventListener('load', ...) which calls merchantwidget.start({...}).
Region targeting (optional)
If you omit region, Google uses globalization logic to determine the shopper’s location. If the shopper is in an unavailable region or the location cannot be determined, nothing will be rendered when globalization logic is used. To force a region-specific experience, pass the region parameter. Supported region codes:
US— United StatesIN— IndiaCA— CanadaAU— AustraliaGB— United KingdomJP— Japan
US example:
<script id="merchantWidgetScript" src="https://www.gstatic.com/shopping/merchant/merchantwidget.js" defer></script> <script type="text/javascript"> merchantWidgetScript.addEventListener('load', function () { merchantwidget.start({ region: 'US' }); }); </script> IN example (India):
<script id="merchantWidgetScript" src="https://www.gstatic.com/shopping/merchant/merchantwidget.js" defer></script> <script type="text/javascript"> merchantWidgetScript.addEventListener('load', function () { merchantwidget.start({ region: 'IN' }); }); </script> CA example (Canada):
<script id="merchantWidgetScript" src="https://www.gstatic.com/shopping/merchant/merchantwidget.js" defer></script> <script type="text/javascript"> merchantWidgetScript.addEventListener('load', function () { merchantwidget.start({ region: 'CA' }); }); </script> AU example (Australia):
<script id="merchantWidgetScript" src="https://www.gstatic.com/shopping/merchant/merchantwidget.js" defer></script> <script type="text/javascript"> merchantWidgetScript.addEventListener('load', function () { merchantwidget.start({ region: 'AU' }); }); </script> GB example (United Kingdom):
<script id="merchantWidgetScript" src="https://www.gstatic.com/shopping/merchant/merchantwidget.js" defer></script> <script type="text/javascript"> merchantWidgetScript.addEventListener('load', function () { merchantwidget.start({ region: 'GB' }); }); </script> JP example (Japan):
<script id="merchantWidgetScript" src="https://www.gstatic.com/shopping/merchant/merchantwidget.js" defer></script> <script type="text/javascript"> merchantWidgetScript.addEventListener('load', function () { merchantwidget.start({ region: 'JP' }); }); </script> Preview the widget in Chrome (before going live)
- Open your page in Google Chrome.
- Open DevTools (right-click → Inspect).
- In Console, paste:
var script = document.createElement('script'); script.type = 'text/javascript'; script.src = 'https://www.gstatic.com/shopping/merchant/merchantwidget.js'; document.head.appendChild(script); - Then run:
merchantwidget.start({}); This will load and show the widget immediately for previewing.
Behavior & display notes
- The widget typically appears briefly (about 2 seconds) with text and then minimizes to an icon; users can click/tap to expand a panel showing ratings, shipping & returns summary, and reviews.
- On mobile, the widget respects
mobileSideMarginandmobileBottomMarginto avoid overlapping critical UI. Test across viewport sizes.
Eligibility (must include this exact requirement)
Note: For shipping and returns, a rating above “Good” is required to be eligible for any Store widget. If this condition is not met, the widget will not render even if the code is present. Refer to your Merchant Center Store Quality program details for how these ratings are calculated.
WordPress best practice
Place the loader and initialization block in the site <head> (header area) — use a header-injection plugin (Insert Headers and Footers / Header Footer Code Manager) or add via wp_head() in a child theme or small site plugin. If you must use a shortcode, still include the loader/init in the header and use the shortcode only for any container markup; header placement is the recommended, reliable method.
Important: copy the exact snippet and values from your Google Merchant Center for your store and do not alter the loader script or the structure of the initialization block.
“By following Google’s official implementation—using the correct snippet, region setup, and testing—you ensure the widget always functions reliably and delivers verified trust signals to your shoppers.”
Testing, Analytics, and Conversion Tracking
Google’s announcement highlighted that retailers using the Store widget saw up to 8% higher sales within 90 days compared to similar businesses without it. To validate this impact for your own store, it’s important to set up proper tracking and measurement.
Step 1: Establish a Baseline
- Review your current conversion rate and sales metrics over the past 60–90 days before adding the widget.
- Use Google Analytics 4 (GA4) or another analytics platform to capture metrics such as:
- E-commerce conversion rate
- Transactions completed
- Average order value
Step 2: Add Event Tracking (Optional but Recommended)
While the Store widget is powered by Google and doesn’t require manual updates, you can add lightweight event tracking to monitor impressions or interactions:
// Example GA4 event tracking for Store widget visibility document.addEventListener("DOMContentLoaded", function() { const widget = document.querySelector('.google-store-widget'); if (widget) { gtag('event', 'store_widget_impression', { 'event_category': 'Google Store Widget', 'event_label': 'Widget Loaded' }); } }); This example logs a custom GA4 event when the widget is visible on the page. It allows you to measure how often the widget is displayed and correlate impressions with sales uplift.
Step 3: Compare Before and After
- Track sales performance for the first 90 days after installation.
- Compare the data to your baseline period.
- Focus on key metrics like conversion rate changes, completed transactions, and checkout abandonment rate.
Step 4: Segment and Analyze
- Break down results by traffic source (organic, paid, referral).
- See whether the widget has a stronger impact on new visitors versus returning customers.
- Use A/B testing (if possible) by showing the widget only on selected product pages to measure incremental impact.
By following these steps, merchants can confirm whether the Store widget is driving measurable improvements in sales performance, and validate Google’s claim of up to 8% uplift (Source: Google Developers).
Why the Store Widget Matters Now
The launch of Google’s Store widget on September 18, 2025 marks a significant update for online retailers. By embedding real-time trust signals such as ratings, reviews, and policies directly onto their websites, merchants can address one of the biggest barriers in eCommerce: shopper hesitation.
Google’s data already shows that merchants using the widget achieved up to 8% higher sales within 90 days, proving its value as more than just a cosmetic feature — it’s a practical conversion booster. For eCommerce businesses competing in crowded marketplaces, the widget provides a verified way to build confidence, stand out from competitors, and improve long-term revenue performance.
For WordPress and WooCommerce users, integration is straightforward, requiring only the official snippet from Merchant Center placed via a Custom HTML block, widget area, or shortcode. Once installed, the widget updates automatically, ensuring that shoppers always see the most current information about your store.
Retailers who want to remain competitive should act quickly: verify eligibility in Google Merchant Center, obtain the snippet, and strategically place the widget on homepage and product pages. Early adoption not only builds trust but also maximizes the chance to capture incremental sales gains.
Official Resources
To implement the Store widget correctly and stay aligned with Google’s latest guidance, refer only to official documentation:
- Google Search Central Blog Announcement (Sept 18, 2025)
- Store Widget Participation Guide
- How Store Quality Ratings Work
- Top Quality Store Status Criteria
(Source: Google Developers)
FAQ
Google’s Store widget is a dynamic element launched on September 18, 2025, that merchants can embed on their websites. It displays verified trust signals such as store ratings, shipping and return policies, and customer reviews directly from Google’s systems.
According to Google, merchants using the Store widget saw up to 8% higher sales within 90 days compared to similar stores without it. By surfacing trust signals like ratings and reviews, the widget helps reduce shopper hesitation and increase conversions.
Top Quality Store Widget — for merchants with Top Quality status.
Store Rating Widget — for businesses with high ratings but not Top Quality.
Generic Store Widget — for stores still building up their quality metrics.
Merchants must first enable the widget through Google Merchant Center and copy the official snippet provided. On WordPress, it can be added using a Custom HTML block, a widget area, or via a shortcode. The widget updates automatically with Google’s latest store ratings and reviews.
Google recommends placing the widget on homepage and product pages. These high-visibility locations ensure that shoppers see trust signals when they’re most likely to make a purchase decision.
Author
Harshit Kumar is an AI SEO Specialist with over 7 years of hands-on experience in search engine optimization, eCommerce SEO, and WordPress optimization. Known for leveraging the latest Google updates and AI-driven strategies, Harshit helps businesses boost online visibility and achieve sustainable growth in competitive markets.


Leave a Reply